Showing posts with label Bees. Show all posts

Thursday, February 14, 2013

Back in Beesness!


Thanks to a wonderful friend and a recent swarm at her home, we are back in bees! The swarm was captured by Steve of Bee Catchers and delivered to our door. I was with the dog at the vet. Eric took the bees and dumped them into our hive. He poured them a plateful of honey in the top feeder instead of using sugar water. After almost a week, I'm happy to say the bees are still here. I was watching them leave and return with legs packed with pollen.

I'm still on the look out for another swarm. I would like to capture it myself. We'd like to have two hives to insure ourselves from being beeless in the future.

Thanks so much to Jackie for the swarm and Steve for the hive capture and delivery. We are so grateful & very happy to be back in bees.

Thursday, January 31, 2013

Beeless


Two weeks ago, we noticed usual activity surrounding the bees. When we went to investigate, we saw our hive was under attack by robber bees. Eric reduced the entrance to the hive. I covered the hive in a sheet.


But our measures we no match for the robber bees. Within a day, our six box high hive was an empty shell of the thriving bee metropolis it once was.


Eric pulled what honey he could from the hive. I cannot express the deep sadness and loss I feel. I went out the very same day on a quest to pick up a swarm. A friend said she had spotted one. When I arrived to the canyon, the bees were not there. I now have a mobile swarm capture box with veil, spray bottle for sugar water and assorted tools to help with the acquisition in the back of my car. We are on the cusp of swarm season. I hope to pick up two swarms to start two new hives at Camp Ramshackle. If you see any swarm in the LA area, in particular Northeast LA or Pasadena, please post a comment to let me know. I'm on the hunt.

Monday, May 14, 2012

Mother's Day


The boys and I made hand dipped candles at my oldest son's suggestion as presents for our mothers/grandmothers. Wax from our bees.


Homegrown bouquets plucked and arranged by my oldest boy adorned the table. Gathered around were mothers, family, great company, with the sounds of music and the steady hum of conversations and stories shared as we sat before plates full of delicious food.


One of the fine kids who opened the door to the amazing journey of motherhood. I am so grateful for the love and wisdom my sons share with me.


And my very own beeswax candle, hand made with plenty of love, presented to me first thing in the morning with the greeting, "You are cool, clever and awesome." A salute to all the mothers along the road.

Monday, March 12, 2012

Apiary Upkeep


Eric and I took advantage of the great weather to open the hive and do some necessary maintenance.


Eric prepped a blue deep box. We put the deep on the bottom. We had some deep frames mixed with short frames in our regular supers. We pulled all the deep frames and put them into the new blue super. The bees had drawn comb below some of the short frames next to the deep frames, so I cut that off and tied it into new frames.


We thought we might cut out some honey, but after moving the boxes about, we decided to let the bees have time to acclimatize to the changes. I hope to go on a solo mission for honey, with Eric as my mentor, in a couple of weeks. I'm looking forward to it.

Wednesday, November 30, 2011

Sewing: Nesting Baskets


I made a few nesting baskets for a school auction donation to hold our contribution of three 8 oz. jars of Ramshackle Solid honey and a beeswax votive candle. Two sets. We don't normally "sell" our honey. The auction for our son's preschool fundraiser seemed like a worthy exception.

The nesting basket pattern is from maya*made. I was inspired, as I often am, by SouleMama.

Thursday, June 23, 2011

From the Hive


Last hive inspection, we were surprised the bees had produced very little honey. The tide has turned. I'm delighted to see that the bees I've seen all over my garden have been busy making honey. Eric harvested some honey and did a bit of rearranging inside the hive to make more room for the bees. As always, the honey is delicious.

Friday, May 27, 2011

Sharing Beekeeping at School


In back to back weeks, Eric (and family) shared beekeeping at our sons' schools. Our youngest is very interested in leading the discussion himself. I think in a few years, he'll be able to do it. I'm amazed how much he knows about bees.


Our oldest wanted to make sure that his class knew about skunks love of bees. We keep our hive elevated so that if a striped stinker comes by in search of bees and honey, the bees will have access to the skunk's belly and, hopefully, will be able to fend off the skunk.

Tuesday, April 19, 2011

Backwards Beekeepers on CNN

Eric posted this on Root Simple, but it merits another post. If you haven't checked it out, you can take a peek here.


Nice work Roberta, Amy, Russell and Kirk!

Backward is the new forward!

Tuesday, January 18, 2011

Weekend Beekeeping


After a lengthy absence, we made it to a Backwards Beekeeping meeting. It is frankly thrilling to see the amount of people interested in beekeeping.


Kirk Anderson was there, of course, spreading the gospel of chemical free beekeeping. I have no idea why this guy doesn't have his own television show or at least rule the greater portion of the universe. He is an amazing speaker. So thoughtful and incredibly witty.


Scooters were brought to Farmlab. I remember when this guy could barely see over the handle bars. His older brother chose to recline and read a book; later in the evening, he (the older brother) succumbed to a nasty stomach flu, poor guy.


Inspired by the meeting, Eric and I came back home and took a look at our hive. This was my maiden voyage. Eric has been the go-to beekeeper at our house while I've been hanging with the kids inside. The kids are finally old enough to be trusted to watch us through the window while we work (although the youngest made a mad naked dash to visit us prior to opening the hive. He returned to his perch by the window, but I think he is a prime candidate for a beekeeper suit.). My suit was an anniversary gift from Eric which is one of the best anniversary gifts ever. My suit came with an Eric drawing about the birds and the bees. I find myself gazing at that card often.


I understand bee fever completely. I'm already an avid proponent of beekeeping, especially Backward Beekeeping. It's about observation and being a true student of the bees.


Under Eric's tutelage (while the boys stayed safely inside the house), we inspected the hive. The bees are drawing comb and producing honey. I did not see the any brood (I only pulled out three frames from the top box). Next time we open the hive, we will do much more. We have some deep frames in the bottom boxes. We plan to take the hive apart & pull out those frames and replace them with the regular sized frames. I'm really looking forward to suiting up and working with the bees.

Kirk, we'll have those deep frames back to you soon.

Friday, August 6, 2010

Homemade Beeswax Furniture Polish


Making beeswax furniture polish has been on my list of aspirations for a long time. The idea intimidated me, so I circled it for a year or so. Some methods recommend grating the beeswax, then pouring turpentine over the shavings and placing the mixture in a capped glass container in the sunlight for a few days until the wax softens. Perhaps it was the threat of grated bloody knuckles clutching a very hard puck of beeswax or the wait, but this method did not appeal to me.

I found a more promising method at UK's Honeyshop. The recipe began with a disclaimer accepting "no responsibility for any damage to property or person in any form whatsoever and you follow this recipe entirely at your own risk". Somehow it allayed my fears. Into the gates of hell, rode I.


I melted a puck of our beeswax, removed the double boiler from the stove, then added the turpentine (just a little more than equal the amount of beeswax). I poured the polish into two stainless steel containers. Let it harden & put a lid on it. Easy. No damage to person or property. Beeswax polish aspirations attained.

I've been happily waxing some very dry furniture.

Thursday, July 15, 2010

Capturing Wax


After the crush and strain process we use to collect honey we are left with some wax as a by product. At first we were using most of the wax to paint new starter strips (the strips of wood at the top of a frame that we let the bees draw their own comb from) Now we are beginning to slowly amass a collection of wax we can use for other purposes like candles, wood polish, lip balms, etc.


Once we've filtered the honey out of the crushed comb we end up with a bag of crumbly wax which is covered in honey. I rinse this off in the faucet with hot water till it's clean as I can get it.

I used to wring it out and squeeze it into a ball at this point to get as much water out as possible but now I've found that a little water in the mix can actually be useful.


Next I dump the wax into our handy little double boiler. This was a gift at a white elephant Christmas exchange that has become our dedicated wax melter. It's just the right size and has a Teflon coating which makes clean up easy.


I have an old clear coffee cup that is also dedicated to the bee's wax collection. A scrap of metal screen serves as the strainer. You wouldn't want to use your kitchen strainer for this because there is residual wax that collects on it which is darn near impossible to completely remove without solvents.


Here's the hot wax poured into the cup, still cooling. that brown stripe at the bottom is water. I have found that a little water serves a useful function in that the heavier particles that make it through the screen sink to this area and don't end up in the wax.

The last step (I didn't get a picture of this one) is, once the wax has cooled to near room temperature, put the cup in the freezer. This is the easiest way to get the wax to release from the cup. The wax contracts and the water expands as it freezes so all you have to do is slip a knife between the edge of the wax, down to the icy sludge at the bottom and it comes right out. You could probably also just set it on the counter till the ice melts but I haven't had the patience for that yet.

Rinse the ice off the bottom with hot water or just leave it in the sink till it goes a way (again patience) and you have a nice clean plug of beeswax.

cross posted at the backward beekeepers blog: Beehuman.blogspot.com

Wednesday, July 14, 2010

Different Kinds of Honey - One Harvest

This week I harvested another couple of frames of honey. We have seen a tremendous difference in the honey over the course of the year but this time it was really apparent in the two frames I pulled.


You can see the difference in the bucket before the crush and strain.


We decided to do a taste test. The lighter honey on the left almost certainly came from citrus; it had a very light almost lemony sharpness to it. The darker honey on the right was more flavorful and more of a carmel flavor to it.

It would have been great to keep them separate but I had already put them in the bucket and figured it would be cool to find out what the 50/50 blend would taste like. It's kind of like blended Scotch vs. single malt.

I think that over time I might be able to look for signs when one flow is ending and another beginning to keep the honey strains more discrete.

Monday, June 7, 2010

More Delicious Honey


I am way behind on our hive maintenance, I wouldn't be surprised if they swarm soon - might not be the worst thing to get a new queen in there anyway. I do like honey but am certainly not taking the effort to maximize our honey production at the moment. I am more than happy as long as the hive is healthy and happy, and we get a few quarts of honey every couple of months.

That said, I feel pretty guilty about not staying on top of the apiary duties a little better. Specifically, I need to add a box to the brood area and sort out the mix of medium and deep frames that are filling two medium boxes down there. This weekend I stole a half an hour and took two frames out before my smoker went out and I ended the endeavor on high note. The two frames won't really free up much space for all of the new nectar coming in but I imagine every little bit helps.

The two frames of honey especially helped make our breakfast the next morning better. For me there are few things better than natural, chem-free honey on home baked whole grain toast. the 56 ounces of honey also made a nice center piece.

Thursday, June 3, 2010

Homegrown Lemonade


The other day, when I was watching the boys, we were out of juice (at least I thought we were), but life had given us lemons (actually the previous owners of our house had planted a lemon tree) so I made lemonade.

The best part was that the sweetener was home grown too - honey from our bees. The ice and water were delivered by LADWP, so it's not 100% homegrown I suppose but close enough for me.

Friday, May 14, 2010

Bees on California Native Ceanothus


Bees and plants are happy with the extra rain we got this year.

Thursday, February 18, 2010

Honey Honey Honey


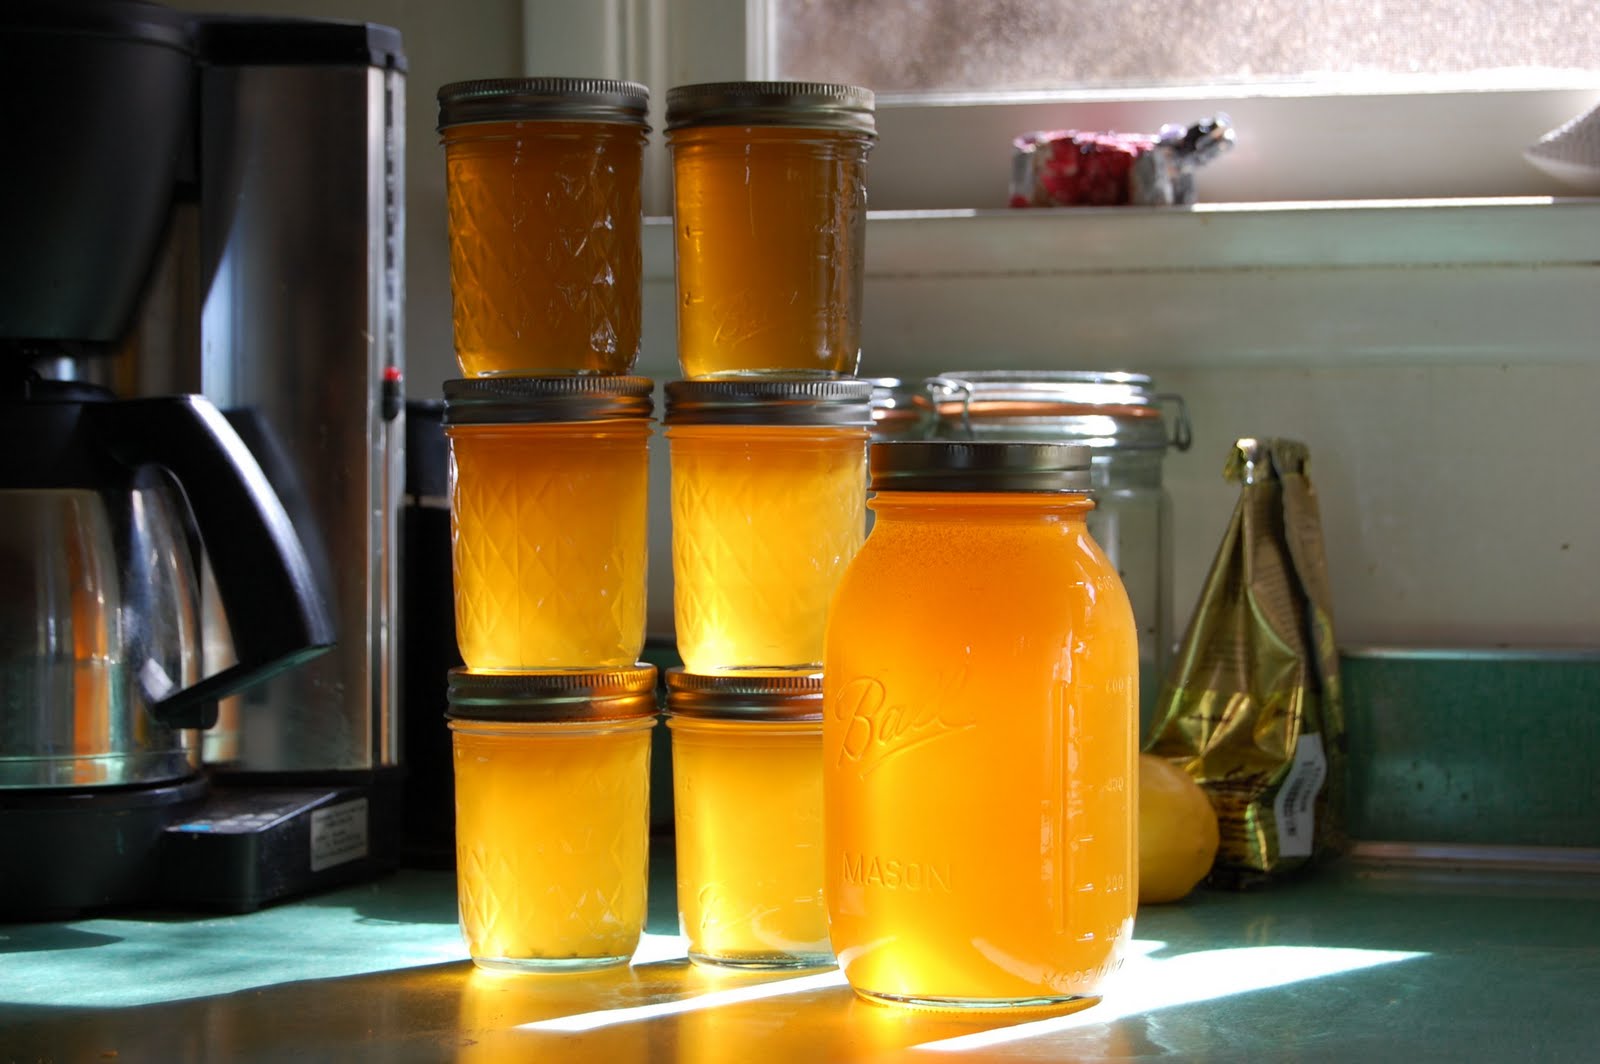
Crushed, strained, bottled.

Previously:
First Honey Harvest

Wednesday, February 17, 2010

More Honey Harvested This Weekend


The weather finally warmed up and I was able to collect a few more frames of honey. Not quite as much as I had expected. I thought that the whole top box had been full of honey when Kirk and I opened it up a couple weeks ago but when I went back in this time there was 1 frame of brood - half drone and half worker, 1 frame was partially drawn with new comb, another frame was half drone and half honey, a few had uncapped honey, some only capped and some mixed.

I took as much as I could before the bees got really peeved but that ended up being only about 3 and a half frames (I tossed the half a frame of drone brood at Kirk's instruction). As you can see in the picture above, some of the honey was uncapped but I think we stayed within the 10% limit. Uncapped honey has a higher water content and will spoil in the jar if it exceeds 10% of the mix.


The bees are doing well overall though. If you click this picture you can see two drones on the porch and two foragers laden with pollen. I still need to finish the starter strips on a deep box I put together last weekend. Once I do that I think I'll call Kirk for help adding it to the bottom of the hive and reshuffling the rest of the frames. I'm confident I could do it myself at this point but with Kirk's help I know we'd get it done much faster with less stress on the bees.

Wednesday, February 3, 2010

Hive Inspection with Kirk


Kirk (the founder of the Backwards Beekeepers) came over this weekend (sporting his awesome Mohawk, I might add) to help me out with the hive. We pretty much just did a hive inspection and made sure that the queen is still in there (new eggs and fresh brood indicate that she is).

The hive was started with 5 deep frames that we just put into the upper of two medium boxes and let hang down into the lower box. At the time we filled the other side of the bottom and top boxes with blank medium frames each but I cant' get to the bottom 5 frames without removing and setting aside all 5 deeps and the box.

So when Kirk came over I was thinking that we would take some of the deep frames and cut them down and tie them into the mediums but we decided that a better way to go would be to just buy a deep box and move the 5 deep frames to that box with 5 more new deep frames, then put the remaining 10 mediums all in the same box above that. That will give us 1 deep and 1 medium box for the brood area although we keep an open brood nest so the queen can really lay wherever she wants - as she sees fit.

The piece of comb above fell off the bottom of one of the deep frames that we took out to examine. The deeps don't go all the way to the bottom of the lower medium so the bees just took it on them selves to use all of the space they could.

It was important to put that brood back in the hive on an new frame because what we found was that the hive is honey bound. That means there is so much honey in there that there is very little room for brood. Some of the lower deeps were even completely full of honey.

Here is the one frame we pulled to replace with the brood comb above tied into a new starter strip frame. As soon as the weather warms up a bit and the bees have a chance to forgive and forget, I'll go back out and pull that box of honey which we moved to the top of the hive. Kirk will probably come back to help me put the new deep box on the bottom once I'm ready and the weather warms up a bit. There are a lot of bees in the hive now and it will be much easier if most of them are in the field when we do the work.

By the way, you can see that brighter box that I added in the last post about the bees has moved down a spot and has settled in with the rest nicely. It just took it a little time to conform to the others.

So all is well with the hive and we will be up to our stingers in honey as soon as the temperature rises a bit. By the way we have a meeting coming up on Feb. 28th - join us!

Previously:

Tuesday, January 5, 2010

Bee Problems

We've been having a few (hopefully minor) problems here at Camp Ramshackle with the bees lately. First was that I've noticed some lethargic bees hanging out on top of the hive and many dead bees out in front. I thought this was likely due to a cold snap and some wind and rain that we had recently but after reading recent posts by Marianne and otherson the Backward Beekeepers Yahoo! Group I fear that the trouble could be more serious. Marianne's bees collapsed due to a mite infestation. I hope the same is not happening here and am hopeful that the small cell method we employ might keep our bees going.

This is a close-up picture of a small sample of the hive front carnage (click to enlarge). Not too bad but still the casualties number in the hundreds.


The second problem was the addition of the new box and this one is a double whammy. The most obvious problem is the huge gap between boxes. I am not sure how this has happened. The box sits flat on the floor but on the hive it teeters at the corners leaving a gap nearly as big as the formal entrance at the bottom. It spans nearly half of the front and down the side.

The thing that you can't see here is that I think I may have killed the queen. When I added the box I pulled a frame up from the middle of what was previously the top box and replaced it with an empty frame with the intention of encouraging the bees to move up into the new box.

When I pulled the frame out it was covered with bees and they became pretty agitated. I carefully slid the full frame into the new box which was sitting on a shelf just outside of the frame of this picture.

I put the new box on top of the hive and futzed with the gap for a few minutes before I realized that I wasn't going to fix it right then with the bees getting madder by the second. When I looked back at the shelf I saw a ball of bees clinging to the wall and a small gap at the back of the shelf. I gave them a puff of smoke to encourage them to go back to the hive and that's when I saw her. The queen had been on the frame I pulled, didn't like all the light and tried to climb down into a dark place for safety. I gave her a gentle flick toward the hive (probably not a great idea in retrospect) and hoped for the best.

Today the bees were ornery as all get out - head bonking and eventually stinging our son on his head. Their behavior reminds me of when Kirk brought the hive and they were not queen right. I am afraid the queen may not have made it back inside. If she didn't the bees should be able to take care of things by themselves by making a new queen. If that's what happened we could be back in business in a couple of weeks - I just hope we don't also have a severe mite problem or that the gap contributes to their difficulties in some way. For now I'm keeping my fingers crossed.

Saturday, December 12, 2009

Native Bee on a Dandelion


I saw this little green bee feasting on a dandelion as I walked past a patch of weeds on my way to lunch.


If you click on the picture you can see a bigger version.