Showing posts with label projects. Show all posts

Thursday, April 5, 2012

Windlass


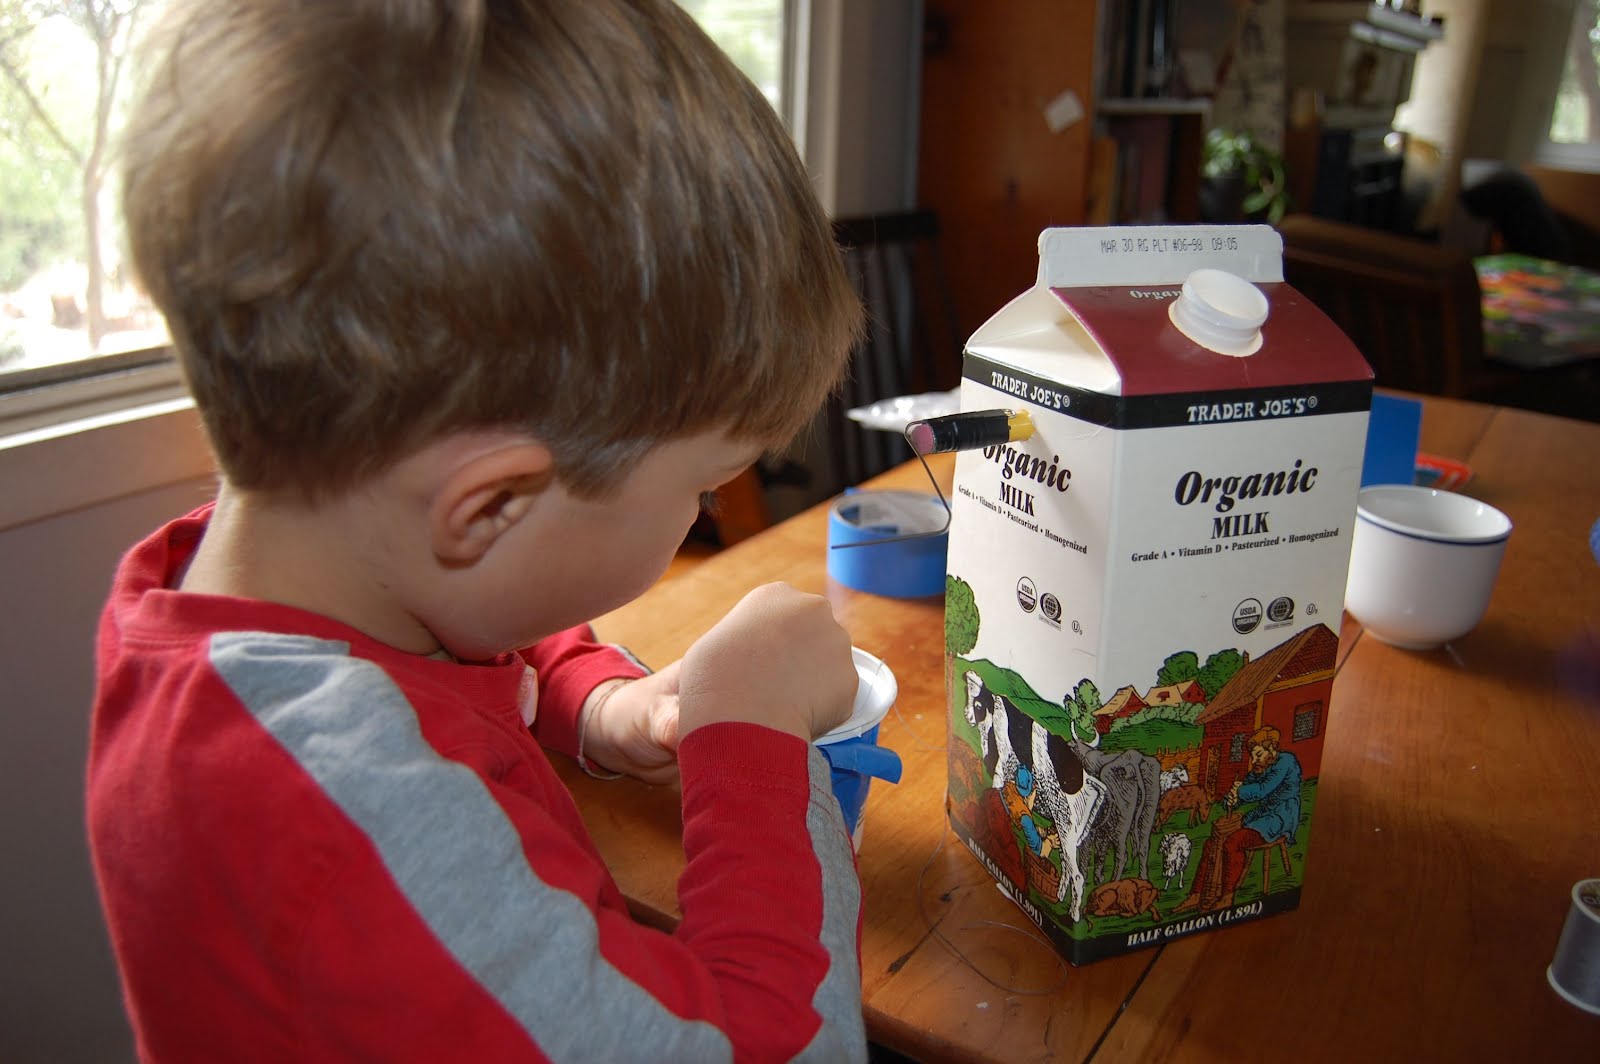
Through Freecycle, we picked up a stack of contemporary Boy Scout manuals. My youngest son spotted the instructions on how to build a windlass.


He waited patiently for the milk carton to become available, opting for refills at dinner to do his part. I found him at the table with all the tools at the ready, so we dove in and made the vision a reality.

Wednesday, February 29, 2012

New Life as Bench for Salvaged Coffee Table


I have been keeping my eyes glued to the curb and garage sales in search of a coffee table I could transform into a bench for the tent for a long time. I want something that will mainly operate as a bench with a custom cushion (to be sewn later), but could easily do double duty as an art table or Japanese style seating table for casual eating for kids and game adults. Something sturdy and decent looking, but not too nice, so it still makes sense for the kids to paint on it & use it roughly as necessary.


Driving to school one day, I saw this inlayed wood table along the side of the road and felt it would do. I pulled over & popped her into the wagon. I quickly sanded it and not so quickly finished it. I used a couple of coats of Watco teak oil. I have yet to sew a cushion for it, although I acquired a piece of salvaged foam from the local upholstery shop. I've never sewn a big cushion with a zipper before & I'm a bit intimidated. But I know I will. Often the urge will whip down like a tidal wave of ambition dwarfing the fear and I find myself just pushing through the project and learning as I go.

Tuesday, December 27, 2011

Material Transformation: Quilts


I have wanted to make a quilt for most of my life. I remember as a young girl starting a quilting square. I had no access to a sewing machine, so the radial star with small blue flowers was completely hand sewn. The square sat. My aspirations grew. Although a quilt can be a simple process, the process intimidated me.


So I read about making a quilt. People who have done it. How to do it. And I studied quilts I saw. I pulled out materials I had on hand & placed them together to see how the patterns and colors would mix. I decided this Christmas, I will make my sons quilts. A simple quilt with large blocks of fabrics I had on hand.

And I thought and thought about it until December 21st hit. I jumped into action. The boys have a small bunk bed, so I sized the quilts to fit the bed without a lot of extra fabric that would hang down the side of a traditional bed. I cut multiple pieces in 15 inch widths. To size to the bed, one row would be nine inches in width. My fast approaching deadline quelled any over-thinking on the piecing (except for the decades of thought that went in to reaching my quilt making action potential). I made a diagram of how it would look and cut the pieces to length. To back the turn-quilts (no binding), I used mattress ticking and some chestnut drapery fabric I picked up at an impromptu yard sale in the Rite Aid parking lot down the street.

Making a quilt is like magic. You piece together fabrics & they magically transform into a blanket. I literally jumped up and down when I saw them together & giggled like a school girl who just had a disappeared coin pulled from her ear by a slight of hand illusionist.

The boys unfurled their quilts in thrilled delight.

Thursday, June 30, 2011

Kid Summer Project: Quills


Today we hope to make quills at the request of my oldest son. We tempered the feathers yesterday by putting the base of the feather in heated sand and letting it cool. Tempering is not required but supposedly lengthens the use of the quill.

The idea for making a quill came up late in the day. We didn't have enough time before bedtime to tackle the project, so tempering seemed like a step in the right direction following inspiration. Today, we have all the time in the world.

Tuesday, April 26, 2011

In Progress: Claiming the Garage


When we took hold of the title to what has become Camp Ramshackle a mere nine years ago, an ample amount of boxes filled with items from our previous home went straight into our garage. Our items also joined a colony of things left by the previous owners. Eric and I have both worked at various times to deal with the garage. Admittedly, it has been in fits and starts.

Something caught hold of me as of late and I have been steadily working on the garage. I am reminded of my work finally straightening out a storage space in our small home when my youngest still had chubby legs.

Entering the world of the garage is a mixed bag. Some parts of the excavation/reclamation have gone smoothly. But parts of the garage are like a time capsule. Going through the amassed items, paper work and art is almost like psychoanalysis with a specter of who you were then through the lens of who you are now. Sobering.

The job is large, so I've adopted the rhythm of working on it every day for about 20 minutes. The interesting transformation since I've been in the garage so much is that I have fallen deeply in love with my garage...not for what it will be when it is all organized...but for what it is right now. My garage is a great place. I'm looking forward to getting in there today and making more headway. I imagine once I get it all cleaned up, I might just be in there all the time.

Thursday, February 24, 2011

Outdoor Tub Set Up


Galvanized tin tubs are in wide use at Camp Ramshackle. The kids bathe in them. Mulch is moved with them. Trees tended. Seas sailed. They hold icy beverages when the kids and mulch are fished out. Eric and I had many late night ruminations about getting a tub in our size and even went as far as acquiring a decomposing redwood tub via freecycle when I succumbed to the great redwood tub delusion.

This Christmas, Eric presented me with an oblong stock tank and outdoor propane shower. After finishing tent repair in our weekend of tending to lingering projects, we worked on the outdoor tub. A permanent location has not been determined. Instead the tub launches it's tour of Camp Ramshackle debuting outside the kitchen just above the patio area.


This could be the permanent location or perhaps one of many. It can go pretty much anywhere, but it needs to be near enough a water source. I moved some pavers that came with the house and serve a path that is no longer used and played with repurposing them as a tub floor.


This was a great day for outdoor bathing at Camp Ramshackle. Even in this elementary set up, the adult sized galvanized tub delivers. Kid tested. Parent approved. A running joke with Eric and I after a long day, is "I'm just going to sit in the hot tub." Now, we actually can.

Monday, November 22, 2010

Fence Addition


Our friend Phoenix finished the fence on the east side of our property that butts up to the newer developments.

In 2004, fueled by repeated dog breeches and terrorized mail carriers, Eric and I built the fence surrounding the lower east, south & west sides of our property. We left the east side open because it was amusing to us that the big new mansions had a lovely vista into our yard with a decrepit chicken coup christened the "What-Have-You" by the developer. Our yard kind of matches the neighborhood. On the hillside to the south of us, one neighbor has about three abandoned station wagons and two VW bugs on blocks...our neighborhood Concours d'Elegance.

Thanks, Phoenix, for the beautiful fence. I think I see the developer next door crying tears of joy.

Wednesday, November 17, 2010

Annals of Home Improvement: Kitchen Reorganization


Eric and I reworked our kitchen space a bit with a few small improvements. Above is the kitchen before shot.


We thoroughly cleaned out the dryer and flipped the door so that it opens to the left. We use our laundry line outside the house, but we still have a dryer in the house. We've had it since we moved in.

Whenever I think about the To Have and Have Not debate surrounding a dryer, I am reminded of Kelly Coyne's funny recap of the ongoing debate in her house. She writes about it in her and Erik Knutzen's wonderful book The Urban Homestead.


We added some simple hooks. I originally suggested we use some of the beautiful hooks Eric made from our olive trees. But he suggested something simpler would be better suited for the space. I agree.


I had picked up an old green metal cabinet a few years ago from a garage sale (the date stamped inside reads July 4, 1910). We had it on the ground in our kitchen to house a few tools frequently used around the house, gardening gloves and a few other items. Eric built a stand with casters for it, which makes cleaning around it much easier. We can just pull it out to sweep and mop.


Eric counter sunk the bolts and threaded on the casters to a piece 2x4 then glued them to a cut piece of plywood.


The original cabinet is on the bottom. Eric remembered another cabinet from a work table I picked up at a garage sale over a decade ago and sagely suggested we put it in the kitchen on top of the other cabinet. This very small project has greatly improved how we use the space in our kitchen. Plus, I just love the way it looks.

Wednesday, November 10, 2010

Annals of Home Improvement: Trailer Hook Up


Plumbing is one of those tasks where I depend on professionals. It seems like it would be so easy to hook one pipe up to the next, but it never works that way for me. I was impressed by Jeremy's work at Rancho Garbanzo where he replaced his house's main line to the city sewage. Nevertheless, the pros dug in to attach the trailer to the main sewage line.


Having the right tool for the job...like a jackhammer to remove the pavement...is helpful. Prior to this job, we ran a camera down the sewage line to see where we needed to dig. Some people opt for general ballpark digging. We figured it was worth the cost to know exactly where the connection would be made.

By turning the trailer around, the distance to dig was reduced from about 20 feet to about five feet.


Pedro our plumber made quick work attaching the pipes. (The sinister gouge to the left of the pipe occurred about a year ago after some serious rainfall. The trailer fell from the jacks and landed with a crunch. Fortunately, the trailer was unoccupied and no one was hurt. The gouge was the extent of the damage.)


He exchanged the solid pipe for a flexible hose. Although it may be the soundest structure at Camp Ramshackle, it's a trailer and bound to settle. The flexible pipe allows for a bit of movement.


The dirt was replaced on the driveway. Next, we'll need to repair the asphalt.
Wednesday, August 18, 2010

Beach Chair Given New Lease on Life


When Eric and I first started seeing each other over a decade ago, a typical summer Saturday or Sunday we'd be at the beach. We'd head out early morning, set up camp and spend the rest of the long day in the water or resting on the warm sand. This beach chair acquired at a yard sale a long long time ago frequently made the journey with us.


Until one day, Eric adjusted the armrest. The wooden arm grew jagged fangs and bit back leaving a long and thick splinter in his hand. I still remember the shock on his face and slowly raising his left hand to reveal an almost two inch long 1/4 inch wide protrusion. The offending chair was put to pasture and our beach days evolved to include one and then two kids.

In light of commemorating our years together, I pulled out this beach chair and set to fixing it. I sanded the left armrest to remove the biting teeth.


I made beeswax furniture polish specifically for this project, conquering my phobia of doing so.


I cleaned up the chair and polished the arms.


As I work at the speed of parenting, I worked on this project for about two weeks. The project wasn't so difficult, but there was table tennis to be played, books to be read, scooter rides and sculptures to witness. In spite of living with this chair restoration for a fortnight, the boys kept it under wraps. And I was able to surprise Eric with a restored relic of our early life together.

I'm envisioning a time when our beach days will evolve again...when we get to swim with our boys in the ocean...when they move on to chase lions and Eric and I return to long days together at the beach much richer for the journey together.

Friday, August 6, 2010

Homemade Beeswax Furniture Polish


Making beeswax furniture polish has been on my list of aspirations for a long time. The idea intimidated me, so I circled it for a year or so. Some methods recommend grating the beeswax, then pouring turpentine over the shavings and placing the mixture in a capped glass container in the sunlight for a few days until the wax softens. Perhaps it was the threat of grated bloody knuckles clutching a very hard puck of beeswax or the wait, but this method did not appeal to me.

I found a more promising method at UK's Honeyshop. The recipe began with a disclaimer accepting "no responsibility for any damage to property or person in any form whatsoever and you follow this recipe entirely at your own risk". Somehow it allayed my fears. Into the gates of hell, rode I.


I melted a puck of our beeswax, removed the double boiler from the stove, then added the turpentine (just a little more than equal the amount of beeswax). I poured the polish into two stainless steel containers. Let it harden & put a lid on it. Easy. No damage to person or property. Beeswax polish aspirations attained.

I've been happily waxing some very dry furniture.

Monday, May 24, 2010

Outdoor Furniture Maintenance Continued


Late May, I started some much needed furniture maintenance for six outdoor chairs. I've been treating them with Watco Teak Oil. I was on a roll with three chairs done when my bottle ran dry.


Both my local hardware stores were out. I guess everyone had the same great idea to take care of outdoor furniture, too. This week, I finally was able to get my hands on some more oil.


On Sunday, I finished two more chairs. One more to go. I feel like I'm on the twenty-third mile of a marathon. I can see the finish line.

Friday, April 30, 2010

Another Outdoor Chair Oiled


No one is more surprised than me that another outdoor chair has been oiled. Somehow, I've been able to work on outdoor furniture maintenance while the boys play outside. And not to sound cocky, but I think I might have finished two more but I ran out of oil.

The count:
Three down.
Three more to go.

Wednesday, April 28, 2010

Outdoor Furniture Maintenance


A great deal of our living at Camp Ramshackle happens outside. Our actual house is quite small, so we have created a lot of outdoor spaces including an outdoor dining room. Outdoor living is great for the spirit, but the elements can be tough on the furniture.


Each time I sit down and lay my arm on the desiccated arm rest, I add a task to my list of Good Intentions to oil the outdoor furniture before it crumbles into dust.

Photo taken by my 2 1/2 year old son.

Somehow my Good Intentions reached Action Potential and two chairs have been sanded and treated with Watco Teak Oil. I'm hoping that the thrill of accomplishment will provide the fuel to finish the other four.

I remain the optimist.

Friday, March 5, 2010

Insulation


About three weeks ago, the insulation truck rolled up to our house, unwound a hose and blew TAP insulation into our drafty attic. Living in a farmhouse construction house brings you much closer to the elements, even in southern California. The insulation was a much needed improvement at Camp Ramshackle.


TAP is 85% recycled post-consumer newsprint. Eric did the bulk of the research about our options. While searching online, he found a post on Treehugger.com about recycled newsprint insulation.

The insulation comes in block form which was opened and put into a shedder/blower machine.


Because the insulation is blown in, the job took only a few hours. The change was drastic. Even with our farmhouse construction (which means that our interior wall is also our exterior wall), the heat is more consistent.


With winter waning, I'm looking forward to seeing how the insulation works with the summer heat.

Sunday, December 6, 2009

Fixing the Truck Brakes


Much of my youth was spent with my Dad in his garage with my head under the hood or chassis of his '33 Ford. My heart squeezed when my sons readily slid under the car to join Eric while he bled the brakes of his truck.

Wednesday, November 11, 2009

Sisyphean Screen Door


If you've followed our blog for a while you already know that we have bad dogs. We love them but they have a compulsion. Here's a post about when Julia fixed our curtains after they burst through the open bedroom window to get at some animal. They often get sprayed by skunks if we let them out at night. But the one thing that really drives me crazy is when they trash the screen door.


This is part of why we are wary of getting chickens. I think we will do it but the coop will have to be built like a little fort. Not just to keep the dogs out but also the coyotes and raccoons.


We woke up to the door like this one morning when a raccoon was probably taunting Moxie from the other side of the glass. But lately it has been the repeated scratching and pawing that has broken the side open again.


Each time I fix it- eventually. I usually try to increase the engineering of it without loosing the character that I love about our old wooden screen door.


Here it is now. Thicker gauge 1/2 inch hardware cloth is on the inside; thinner 1/4 inch on the outside. We'll see how long this fix lasts.

Tuesday, October 27, 2009

Tiffin Lunch Bag


Each year, my son's preschool holds an auction to raise funds for the school. In the past, I made tipis: first and second. This year, I made this tiffin lunch bag and put it together with a stainless steel tiffin and canteen.


The tiffin is a metal lunch box widely used in India.


I made a pattern thanks to the techniques I learned at Machine Project's Sewing 102 class.


Pleased with the result of my auction donation, I made two more for the boys. They are quite enamoured by the tiffin and sweetly appreciative of their new bags.