Showing posts with label sewing. Show all posts
Sunday, September 16, 2012
Natalie Chanin on Sewing
I am a long time fan of Natalie Chanin from her work at Project Alabama to her current line Alabama Chanin. Her designs breathtakingly beautiful with intricate hand stitching and bead work. Even more appealingly, Chanin subscribes to a code of ethics in creating her clothing line. Learn more about Natalie Chanin and her work through this lovely video produced by Creativebug.
Previously:
Alabama Chanin vs Summer List
Alabama Chanin Sewing Workshop
Labels:
Alabama Chanin,
sewing
Wednesday, September 12, 2012
Cowboy Tub Canvas Cover
The outdoor cowboy tub is almost a year old now. Still awesome. When installing, Eric and I discussed making a cover for the tub. At last, I introduce the cowboy tub canvas cover.
Most of my projects begin with a sketch and an idea on how to craft the project. The sketch is just an entry point. I almost always seem to modify once I get going and can see a better solution in the making. To get the template, I put a piece of plywood over the tub & the canvas between the tank and the plywood. I traced the outline of the top, then measured the circumference to get the length of the skirt.
Note to self: the top piece could have used an extra half inch to make the cover slip on more easily. This one is quite tight and pulls on like a form fitting sock.
Labels:
handmade,
ramshackle style,
sewing
Tuesday, August 14, 2012
Alabama Chanin Skirt vs Summer List
I am a list maker by nature. It's not that I stick to the list, but a list helps me keep track of what I would like to do. Often I get sidetracked by the day to day things that require my attention or too fatigued to remember what was a priority before hunger took over. Often my lists are laughable, very aspirational, but sometimes I'll return to them to find what I hoped to do actually does get done over time.
Last summer (as with this summer), the boys and I made a list of what we wanted to do over the summer. We accomplished pretty much everything on the family list. I also made my own list of projects. On it, only "Hang out with kids--HAVE FUN" was accomplished.
On last year's list I included "hand stitched skirt". Much to my surprise, I finished it this summer. The pattern is from the awesome Alabama Stitch Book. Cutting the fabric was tiresome because this is a double layer skirt with eight panels instead of four. I used a rotary cutter on a cutting board, which I recommend. It would be very tedious to cut the t shirt fabric using scissors.
The stitching went very quickly once the fabric was cut & it was incredibly fun to make. I riffed on the waistband opting for a t shirt bias with no added elastic. I may regret this as it stretches, but I figured I was going to just go for it and see how it wears. I'm ready to make another one already, a size bigger. I have plans to dye this one with coffee because white fabric and I are just not made for each other.
In reviewing last year's summer list, I'm pleased to see that without really focusing on it, I've completed four out of six the items on my list: the have fun part, 2 quilts for the boys, tent bench, and this skirt. Cleaning out the garage is ongoing & a quilt for Eric and I remains on the list. Not bad. And hanging out and fun continues to be had.
Labels:
Alabama Chanin,
handmade,
reuse,
sewing
Friday, April 27, 2012
Hand Sewn Doll
In preparation for the preschool's Carnival on May 5th, I also made a hand sewn doll for the hand made fundraising booth. When my youngest was about two, I made him a doll completely by hand only to be stymied by the hair. How to attach it? For my son's doll, I painstakingly sewed on each strand directly to the head and knotted the yarn. Not recommended. It took a really long time.
I bought the book Sewing Dolls by Karin Neuschutz after my son's doll was complete in hopes of learning more about the construction of hand sewn dolls in the Waldorf style. For this doll, I sewed the yarn flat onto the head like a yarn toupee, then added rows of yarn hair on top of that to give more depth to the hair style.
The early sewing was very quick.
Including sewing the face. However, that yarn hair still undoes me. I think this doll may be the last one I ever make. And it can be yours, if you come to Sierra Madre Community Nursery School's Carnival on May 5, 2012, and saunter to the hand made booth and buy it. Your support is appreciated.
Tuesday, December 27, 2011
Material Transformation: Quilts

I have wanted to make a quilt for most of my life. I remember as a young girl starting a quilting square. I had no access to a sewing machine, so the radial star with small blue flowers was completely hand sewn. The square sat. My aspirations grew. Although a quilt can be a simple process, the process intimidated me.
So I read about making a quilt. People who have done it. How to do it. And I studied quilts I saw. I pulled out materials I had on hand & placed them together to see how the patterns and colors would mix. I decided this Christmas, I will make my sons quilts. A simple quilt with large blocks of fabrics I had on hand.
And I thought and thought about it until December 21st hit. I jumped into action. The boys have a small bunk bed, so I sized the quilts to fit the bed without a lot of extra fabric that would hang down the side of a traditional bed. I cut multiple pieces in 15 inch widths. To size to the bed, one row would be nine inches in width. My fast approaching deadline quelled any over-thinking on the piecing (except for the decades of thought that went in to reaching my quilt making action potential). I made a diagram of how it would look and cut the pieces to length. To back the turn-quilts (no binding), I used mattress ticking and some chestnut drapery fabric I picked up at an impromptu yard sale in the Rite Aid parking lot down the street.
Making a quilt is like magic. You piece together fabrics & they magically transform into a blanket. I literally jumped up and down when I saw them together & giggled like a school girl who just had a disappeared coin pulled from her ear by a slight of hand illusionist.
The boys unfurled their quilts in thrilled delight.
Friday, December 23, 2011
Wednesday, November 30, 2011
Sewing: Nesting Baskets

I made a few nesting baskets for a school auction donation to hold our contribution of three 8 oz. jars of Ramshackle Solid honey and a beeswax votive candle. Two sets. We don't normally "sell" our honey. The auction for our son's preschool fundraiser seemed like a worthy exception.
Labels:
Bees,
handmade,
honey harvesting,
sewing
Friday, October 14, 2011
Refashioned Purse

When I scored my silk tri-tie thrifting about a month ago, I also picked up a dollar purse. I hemmed & hawed before purchasing. I don't like having a lot of stuff even when the price is enticing, so I tend to ponder my acquisitions. I finally went with it because the leather was quite lovely. Very soft and made in Italy. I figured if I didn't use the purse, I could reuse the leather for other projects.

Although the leather was nice, the lining in the bag was uninspired: a ripstop nylon with one small zippered pocket. I took that out, used it as a pattern for a cotton print lining and added multiple pockets for a pen and pencil, billfold, bamboo utensils and other mobile gadgetry.
Some projects come together easily. Some don't. This project was a surprising snap. I surprised myself with how easily it reassembled. I even did some no-pin-punk rock sewing which often ends in regret and a seam ripper. The sewing angels smiled kindly on this project...and I minded my language.
Friday, June 17, 2011
Common Thread Tote Bag Class

Months ago, I bought a Groupon for Common Thread Studio in South Pasadena. Common Thread Studio is one of those places that I love to visit, but somehow, I never made time to take a class there or schedule a sewing session. I took advantage of Groupon and a pending expiration date to get my A into G.
Although I was seriously tempted to take the Detail Couture class, I signed up for the Tote Bag class because I wanted a take away. Owner Jin Kim lead the class and made the pattern for the tote bag with a sweet pleat (see last photo). I love taking sewing classes. As a self-taught sewer, I always find it incredibly informative to sit in a session and learn from the pros, like Jin, who is also a designer.
In addition to classes, Common Thread Studio offers studio rental for $10/hour, first two hours ($8/hour after). While renting studio space, you have access to a great commercial grade serger, sewing machines, cutting table, iron and the luxury of spreading out your work area.
Classmate Joy & her beautiful tote bag.
In July and August, Common Thread Studio offers Sewing Summer Camp for budding designers ages 8-17. Judging from last year's photos, it looks like a great experience.
I finished my tote bag with just enough time to pick up my kids from school (ended yesterday for the youngest and next week for the oldest. Hello summer!). Common Thread Studio also has a kid area with toys and a chalkboard in the back behind plexiglass. I think I'm going to throw caution to the wind and take advantage of studio rental time this summer. Some time in Common Thread Studio for me with a bit of ice cream at Buster's for the boys. What project should I tackle?
Labels:
great places in L.A.,
sewing
Wednesday, May 11, 2011
Fair Weather Pants

As a very busy two weeks comes to a tenacious close, I am pleased to have claimed an easy hour to transform an old tablecloth into...
Monday, January 10, 2011
Small Repairs Foster Great Satisfaction

The chenille bedspread from my paternal grandmother already showed signs of wear when I inherited it six years ago. Over time, the the thinning threads near the top of the spread finally broke and grew into two small tears.
I have learned from experience that it is best to repair a tear early. Avoiding and/or postponing the repair results in heartache. The tear gets worse, and I reprimand myself for not taking better care of what I have, which unleashes a long trail of self-inquiry that frankly is better spent weeding in the garden or focusing on maintaining/repairing other things.
I made a small patch from some floral flannel to cover the hole on the interior side of the blanket. And sewed larger patches on the exterior of a bright pink with dragonflies.
I found it easier to hand sew the project than try to wrestle the fabric under the arm of my sewing machine. I don't think it would have fit either. And I like the hand stitched look of the patches.
While working on my project, my youngest son was inspired to do some stitching himself. Very exciting for me.
Sunday, November 28, 2010
Saving Pants from the Flood

I picked up a pair of pants from Out of the Closet thrift store last week. For six dollars, they seemed good enough for the sartorial demands of my casual life. However, they were a bit short. Not drastically, but short enough to have a vaguely Pee Wee Hermanesque flood quality to them.
I ripped the hem out. There wasn't enough material to lengthen the pant leg and keep a proper hem.
To address the issue, I used some bias tape I scored at a local yard sale a few years ago. I machine stitched the bias tape on the raw edge, created a half inch hem & hand sewed the hem. The hem looks neat and keeps the length. Now I have a new pair of pants for a fraction of the cost.
Thursday, November 18, 2010
Craft Fair Debut

My sons' preschool holds two very low key craft fairs each year. Part of the proceeds are donated to the school. There is no booth fee. So it makes it pretty easy to participate. Since my oldest started at the school three years ago, I've contemplated participating with a table of my own.
I finally got it together this year. I made some bamboo utensil holders and two tiffin carriers. Eric gave me a utensil kit three years ago as a present. I use them all the time. I thought I'd share the love and make some for others.
I added a few plants to fill in the table: nasturtium grown from seed harvested from our yard and some succulents also from our yard.
The boys contributed the fishing poles. The idea was conceived by my oldest son. Many were made over the summer and became gifts for friends. When I mentioned the pending craft fair, I asked my oldest if he was interested in making some. My youngest jumped in and harvested the bulk of the branches. We had a great evening putting them together. The boys were thrilled that people bought them.
Ironically, the year I finally get it together to participate, the craft fair was shut down early by the police for lack of proper permits. A real renegade craft fair.
Monday, October 18, 2010
A Few Shirts Stitched

In between trips to the pumpkin patch, baking cookies and planting the preschool garden this weekend, I was able to catch a few minutes behind the sewing machine. I made the shirts above for a little someone who is about to introduce himself any day now.
And I made this shirt for my littlest guy inspired by one made for his older brother. I think I'm going to add a brown smaller circle in the middle of the target when I can get him out of it. My son is quite excited about his latest wardrobe addition.
Labels:
sewing
Tuesday, October 12, 2010
Small Projects with the Sewing Machine
I grabbed about an hour out of my day to sit behind my sewing machine and tend to some mending. I fixed some of those nagging little things like a separating elastic waistband. I followed the advice I gleaned from an Angry Chicken tutorial on fold over elastic. Although my project used conventional elastic, the advice worked great.
Then I turned to another project...an outgrown shirt. Typically, outgrown items are passed down, but I had an idea that this shirt could be salvaged to stay in the wardrobe of my oldest son.
I cut the patchwork out of the existing shirt (I'll use the scraps for other projects) leaving about an inch of material around it.
I sewed it on a larger shirt.
Now the shirt is back in the ring for another round. My son and I joked that we can keep this shirt in his wardrobe until he's a grown man.
Tuesday, September 28, 2010
More Mending

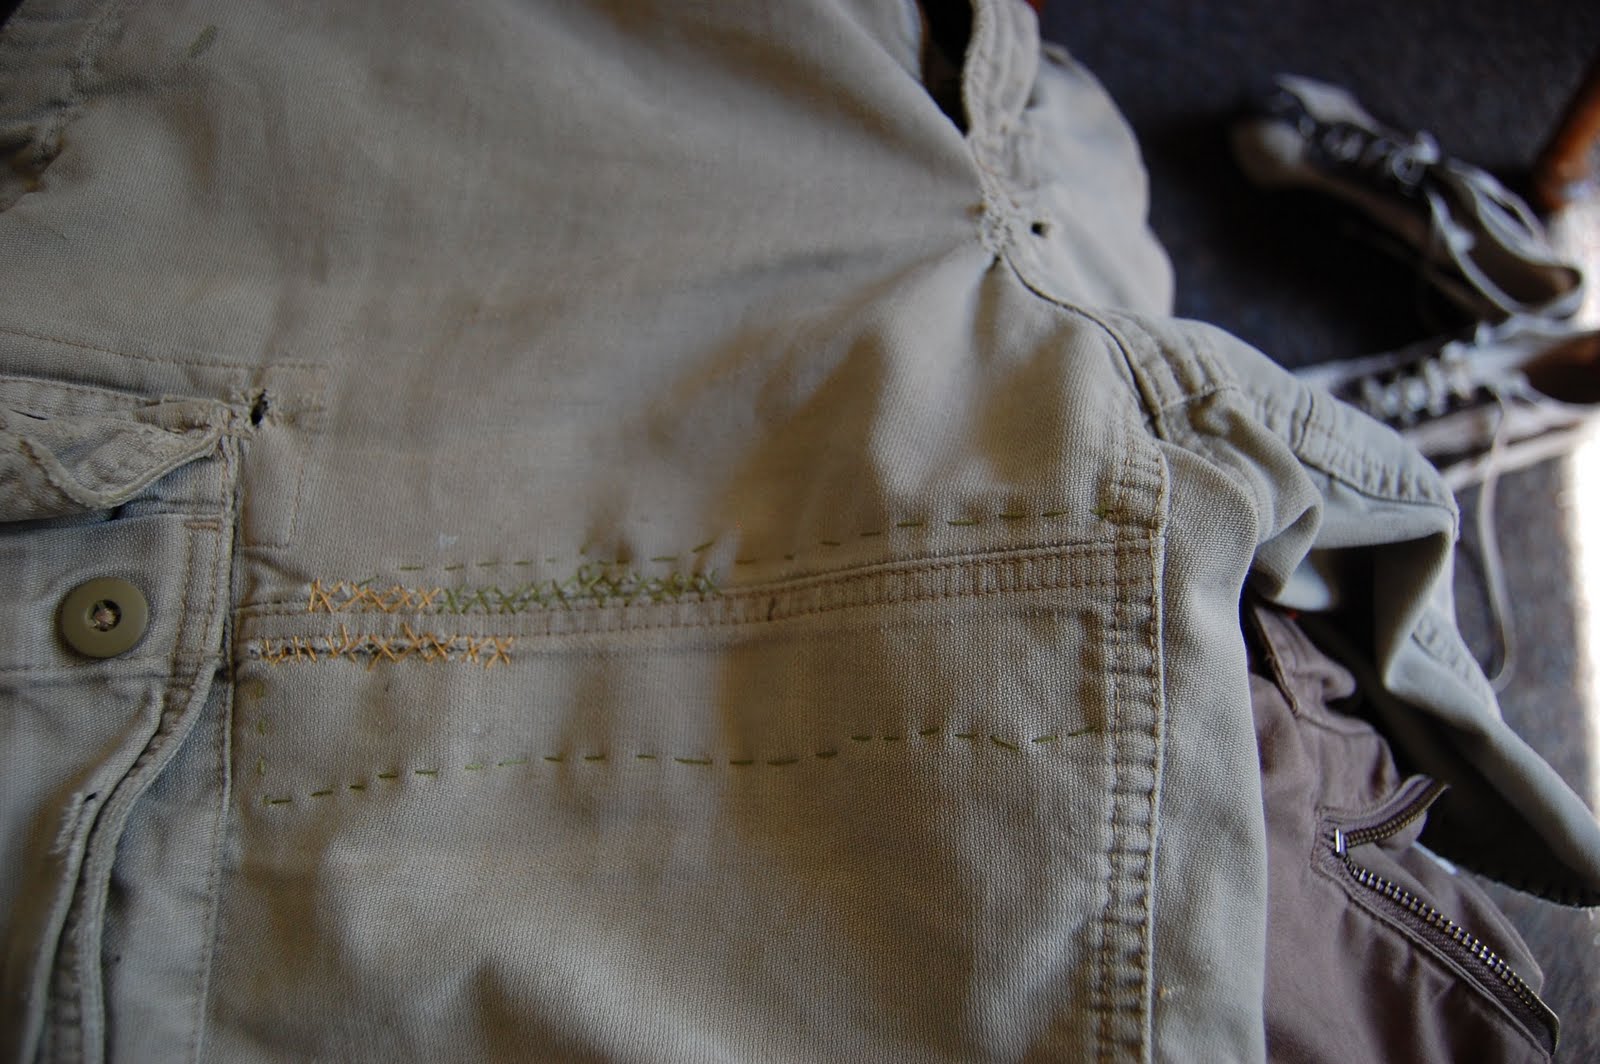
When a seam on the front of my worst pair of shorts split on two sides I was about to give up on them. I had already fixed the hem (kind of) about a year ago in what I thought was a last ditch effort to keep them in rotation for another season. For some reason, once again, I decided to patch them up instead of composting them. Using the sewing machine is kind of a drag for me sometimes. It's often easier and quieter and kind of meditative for me to get a needle and some thread and just sew.
I'm not very good at it and don't really care to be necessarily but I have noticed that I am getting better in spite of myself. Real sewing aficionados will probably shudder at my technique which rarely involves pins or ensuring that I have enough matching thread before I start.
This time I started by using a simple running stitch to tack some roughly matching duck cloth to the back of the hole. Then I used another simple cross stitch to hold the floppy pieces around the holes down to the patch from the front.

From the back the cross stitch makes a kind of boxy serpentine pattern.
I don't fix these shorts because I love them. The reason I continue to patch them up and wear them is because it's really nice to have shorts to wear that I don't care about at all. Kind of funny when I think about that.
Labels:
sewing
Monday, September 27, 2010
Weekend Sewing Projects

Eric took the boys out on Sunday. I took advantage of the quiet to tend to some sewing. I fixed my oldest son's favorite pants by adding two new patches to cover some noxious tears. I believe the holes were acquired while climbing the bottle brush tree, currently my son's favorite climbing tree.
My sister gave me this buckwheat pillow perhaps a decade or so ago. I use it constantly. After years of use, the material started to show signs of age and fray. Buckwheat kernels began to escape from a few tiny holes peppering the bedding with tiny like pebbles.
I adopted a temporary stopgap measure that took on permanent status. I stuffed the leaking buckwheat pillow into a case. As you can see, there is no closure, so the kernels could still empty into the bed if turned the wrong way.
Those days are over. I made a new cover with some linen from etsuko furuya for KOKKA 'tiger on the flower'. It is the dawn of a new era.
Friday, September 17, 2010
Sweet Presents
The little guys celebrated their birthdays over the Labor Day weekend. My Alaskan island living sister-in-law and her family always make such sweet presents. These two creatures, red guy is Sharpie, came with a hand drawn card featuring the two monsters devouring birthday cake thanks to the creative talents of my dear niece.
And this green sweetie cyclops is Tyson and already a favorite.
Thanks Alaskan Poseys!
Subscribe to:
Posts (Atom)